Showing posts with label Halloween. Show all posts

Saturday, November 1, 2008

Christmas Madness is Upon Us...

Well, my Halloween countdown went a little sideways, due in part to a teething baby. We had four molars in two days - so there's little wonder why she was having such a tough time of it! So, now that Halloween is over - its time to start the Christmas festivities!!! I know in the US there is still Thanksgiving before the real Christmas crunch begins, but here in Canada, Christmas begins the day after Halloween. In fact, while I was doing some last minute shopping last night in Walmart, they were already installing the Christmas displays where the Halloween candy had just been...


Before we leave Halloween though, I though I'd share this photo of my daughter dressed for Halloween. We dressed her up last year as well but she was only two weeks old so the costume just swam on her. I've discovered that trying to shoot good pictures of a one-year-old in costume is a difficult task - but this is one of my favourites. The hat stayed on for about 20 seconds...although she did learn to say hat last night. Of course, she keeps dropping the h sound so she sounds French Canadian... 'at, 'at, 'at!


My first Christmas project is this little pyramid box filled with "Candy Cane Seeds"...otherwise known as peppermint candies. I had caught the triangle box tutorial on Splitcoast this week. Beate always does such a wonderful job with her projects but I was looking for a box that was a bit more pyramid shaped so I adapted a template to make this little box. You can fit two of these boxes on a sheet of 8.5x11 cardstock with loads of room to spare. They will hold a small amount of hard candies or Hershey's kisses.

I printed the box on some candy cane themed cardstock I had, cut out a window and backed with acetate and then added the stamped image mounted onto a scalloped circle. The image is actually the Candy Cane Penguin from Whipper Snapper, but I only stamped a part of it for this project. I pierced the top of the box with a piercing tool and added a small jump ring to thread onto the sentiment and then I tied a ribbon through it.

This is the poem attached to the box:

I once knew a gardener who could grow,
bright tasty candies right out of the snow.
I asked him to share his secret with me,
and this is what he said quite readily:
“To garden in the winter is difficult you see.
It takes lots of care and a very special seed.
I'll give you some to grow your own treats.
You'll soon reap a harvest of candy cane sweets”

As always, if you would like the box template, email me at graphixgirlliluAThotmailDOTcom and I will send it to you. One of these days I actually get them uploaded...

Supplies: Cardstock (Reminisce), Stamps (Whipper Snapper), Diecut (Nestabilities), ribbon (Papertrey Ink, Poppy collection), acetate, computer generated sentiment.

Thursday, October 23, 2008

Halloween Countdown - Day 6

Tonight's project is a fun way to use those Spellbinder dies that you've been collecting. No stamping tonight (although you could decorate with stamps if you so desire).


For this project you will need a small container of some kind with a flat lid. I'm using a little clear top, round metal tin. You can buy these about 30 to the case from Wilton - they are usually in the wedding aisle at major craft stores. These are about two inches in diameter. Any flat top container will do.


Cut and emboss several scalloped circles from orange cardstock. You could also use a scallop circle punch. The circles should be slightly smaller than the top of your box.


Use a scoring tool to score down the middle of each circle. They should fold so that the right (top) sides come together.


With adhesive - attach each half circle panel back to back to back. Leave two ends free (i.e. - don't glue them into a full sphere).


Decorate your container how you desire and fill with treats. Then, take the two remaining panels and glue them flat down onto the top of your container. Add a stem and a die cut or punched leaf to finish of your pumpkin container. You may need to "fluff" up your pumpkin a bit.

Supplies: Cardstock (Bazzill, SU, PTI), Patterned Paper (Pressed Petals), Diecuts (Nestabilies - scalloped circles, Quickutz - leaf vine), ribbon, container (Wilton).

Thanks for visiting!

Wednesday, October 22, 2008

Halloween Countdown - Day 5 1/2

So my darling daughter went to bed extra early tonight which actually gave me the opportunity to complete more than one project...yeah!!

Here's a little Halloween project for those times when you might want to give a little something to celebrate the holiday, but you just don't want to give candy... Maybe you have a co-worker without a sweet tooth (I'm sure they exist). Maybe you have a family member who's diabetic.

Anyway, here is a little gift card holder - great place to put a five dollar coffee card or a movie card to go see the latest and greatest horror flick just in time for Halloween!

The sleeve slips right over the holder so you can decorate it as you like and it just comes right off - no need to break or tear anything to get at the "treat" inside. Decorate it however you like. I've used a 2" strip of Halloween print paper to form the band and then added a purple ribbon and a tag with a stamped image. A little bat brad adds a finishing touch to the tab.


If you would like pdf of the template for the gift card holder send me an email at graphixgirlliluAThotmailDOTcom. Two will fit on an 8.5x11-inch size piece of cardstock.

Supplies: Cardstock, Patterned paper (Carolee's Creations), Stamp (SU! Batty for You), Punches (SU! and Paper Shapers), ribbon, brad (Making Memories), Ink (SU!).

Halloween Countdown - Day 5

Okay, my days are a little off as I've missed some here and there - but since this is my blog - I make up the rules as I go along!


This is a really nifty little project, very simple but fun to give to people. I've often made these for Christmas project but thought it might be neat to make a little Halloween version for a change.


You will need a pop-top can of some type. I like the little ones that snack size servings of canned fruit come in. I buy them by the case at Costco (my daughter loves canned peaches). They are about 4-6 oz size cans.


The secret to this project is to open the can from the bottom (not the pop-top). You must, must, must use one of those can openers that does not leave a sharp edge but separates the can lid from the can where it is glued on. They are sometimes called smooth-edge or safety edge can openers. There are a bunch of different companies that make these. I bought mine at a discount kitchen supply store for about $10. They are really nice if you have young children because they don't leave behind any sharp can lids.


Peel off any labels from the can. Make sure that you clean and dry the can very well before starting this project. Fill it up with whatever treat you fancy. Leave a little space at the top so the lid will go back on properly.


Use a glue like Crystal Effects or other clear drying glue and spread a little around the rim of the can bottom. Put it back on the can and press it down. Put something heavy on top if it needs a little help to stay down while it dries. Now walk away.... Go watch tv, play with your kids, make a card, do the dishes, whatever... Come back in 24 hours.


When you come back you should have a can that looks just about like a can you purchased at the store - minus the label. Now you have a blank canvas to decorate however you would like!


Measure the can from rim to rim and cut you paper to that width. Wrap it around the can and secure it with a glue dot or other adhesive. Decorate as desired. Here I have added another band that has been stamped with a spider image (SU wheel), a tag and sentiment and ribbon. I've also added some ribbon to the pop-top ring on the top of the jar. Your recipient will get a pleasant surprise when the open the can to find it full of candy...and not peaches.

Supplies: Cardstock (SU!), patterned paper (Carolee's Creations), Stamps (SU!, Papertrey Ink), ribbon, Ink (Palette, SU!, Ranger).

Sunday, October 19, 2008

Halloween Countdown - Day 4

We celebrated my daughters 1st birthday this weekend with a Halloween-themed bash. It was a great party and we were happy to celebrate the special day with family and friends.


These are the cupcakes I baked for the party and here is a hilarious photo of my daughter eating the cupcakes. I guess this is that quintissential first birthday party picture with the kid shoving the cake into her mouth. It was really funny though. Not sure if I'm going to get that orange icing out of her clothes though...


Tonight's project is a really simple and classic box - the 2,4,6,8 box. This is a great Halloween treat box because you can get two boxes per 8.5x11 sheet of paper and it fits a perfect amount of candy. You can decorate these however you want or even leave them plain in an assortment of Halloween colours. I like lime green, orange, purple and black...


Take a piece of 8.5x11-size cardstock and cut in half so you have two sheets of 8.5 x 5.5" cardstock. Score lines at 2, 4, 6 and 8 inches then turn 90 degrees and score at 1.5 inches.


Cut out the tiny corner piece and cut the short length up to the horizontal score line.


You can decorate the box however you would like. Add stamped images, patterned paper, a background stamp, glitter or whatever catches your fancy. I like to add a bit of texture to my boxes by running them through my Cuttlebug embossing folders. Its best to pick a folder that has a repeatable pattern. This is a new Halloween themed folder.


Keep sliding the folder down until you've covered the cardstock. Make sure that you orient your paper in the folder the way it will be in the final project. The horizontal score line will be at the bottom of the box. After you've finished embossing and/or decorating, fold along the remaining score lines.


I decided to add some colour to the box by putting a band of contrasting Halloween themed patterned paper across the top of the box. The paper is 1.5" wide but 9" long. Make it slightly longer than the box because it will shrink up a bit with the score lines. Glue it to the top of the box and fold along the scorelines again.


You can leave the box enclosed or you can add a viewing window to the front to see the treats inside. I find that the Stampin' Up! punches work perfect for this. If you bring the punch in from the side where the very short tab is (the one you cut the notch from), the punch will be almost perfectly placed in the centre of the panel. Use any punch you like - circle, square, tag, etc. Do not throw away the negative because you will use that later.


Add a piece of clear transparency behind your punch space to make a window. Then use a strip of red sticky tape along the narrow tab, fold the box around itself and stick it together.


Using a couple of additional pieces of sticky tape, fold the box bottoms up and stick them together.


Now that the box is formed, pinch the front and back together, gently folding in the sides of the box. You can put packaged candy directly inside the box, but if you are using loose candy as I did, I would suggest that you put them in a food safe pinch bag. A 2x3-inch bag will fit perfectly in this box.


You can use a hole punch to punch a couple of holes in the top of the box through all layers. I find that this works best with a Crop-o-dile because it can be tough to get through all the layers of cardstock. I add a couple of eyelets at this point as well.


With the leftover negative from your window, make yourself a tag and attach it to the holes at the top with a coordinating ribbon. And you're done!

Thursday, October 16, 2008

Halloween Countdown - Day 3

Today's project was inspired by a Halloween clipart project from Martha Stewart. I liked the concept - just not the design so I redeveloped the template to use as a base for a stamped project. Here's how you do it.


Print the template onto a cardstock (8.5x11) in a colour of your choice. There are two boxes per sheet. Please email me (graphixgirlliluAThotmailDOTcom) if you would like this template. I'm having a tough time uploading documents to my website right now but I promise to update my templates as soon as I can.


Cut around solid lines on template and then score all the dotted lines. It doesn't matter which way you score them - they should bend easily either way.


If you like, cut a piece of patterned paper to cover the bottom part of the box. It should be about 1 7/8 by 3 inches. Glue onto the bottom (left side of template) just below the first fold line. Cut any excess away from the edge and let dry.


Stamp an image onto a piece of white cardstock. The image should be about the size of the top portion of the box (the part with the curve at the top). Its okay if its a bit smaller or larger - just make it roughly the same size.


Colour your image. I've used Copics here but you can colour with your preferred colouring medium.


Put some glue on the front of the very bottom panel and then fold on the score lines back and underneath to form a matchbox like shape as seen here.


Put some glue on the front of the right panel and sandwich the left and right panels together to form the shape in the image. The right (longer) panel will cover the bottom of the box shape at the bottom as well.


If you like, take an ink pad and smoosh it across the surface of the panel to make a distressed background. Cut around the stamped image that you coloured earlier and cut around the edges of the image. Adhere dimensional adhesives (pop dots, foam squares or similar) and stick onto the front of the panel.


The box at the bottom will hold a mini chocolate bar (I've used a miniature Aero bar) and then you can stand it up so it becomes a treat box and a decoration! Cute, huh?

Supplies: Cardstock (Bazzil, PTI), Patterned Paper, Stamp (Whipper Snapper), Ink (SU!, Palette), Copic Markers

Wednesday, October 15, 2008

Halloween Countdown - Day 2

So, before I get to tonight's Halloween project I wanted to post a photo of my little girl who turned the big numero uno today! It's hard to believe it's been a whole year since she came into our lives. I'm so happy to see her grow and change every day - she truly is a joy.

We're having a big birthday for her this weekend but we had a little family dinner and cake tonight and I gave her one gift to open. Actually, we had a hard time getting her to open the present because she spent about 10 minutes playing with the curly ribbon that was attached to the bag. Here's a photo of her playing with her new airplane.


I think she was very excited to have her own "little people". They have them at her daycare and she loves to play with them. Mind you, they spend about half their time in her mouth...


So, tonight's Halloween project is a very, very simple one. I can usually put together a couple dozen of these in an evening. These little slider boxes hold three Hershey's nuggets. About two weeks before Halloween I like to put a basket of them near our door for guests that might stop in to say hi. I sometimes take them to work as well to give out to co-workers. Three nuggets is a nice treat without being too much candy (though, can you ever really have too much candy...).


There are about a million nugget box templates on Splitcoaststampers (okay...maybe not a million...). They come in all shapes and sizes so you can make these as big or as small as you like. These are about three inches long. You can find the template I've used for these boxes here: http://www.splitcoaststampers.com/forums/showthread.php?t=84914. If you are planning to make a lot of these, cut out all your box pieces first and put them together assembly line style.


When I cut out the box templates I also cut a strip of coordinating patterned paper that is about 1/2" narrower and slightly longer than the lid template. I glue the paper down and then score both sheets together. Its important to make the patterned paper slightly longer as it will shorten up a bit when you score it. You can decorate these boxes any way you like. I've added a simple ribbon and a Making Memories epoxy ribbon tag but I've also put on stamped tags, stickers and other embellishments over the years. Its a pretty small surface so you will want to keep decoration to a minimum. Inside, wrap you nuggets in a coordinating Halloween paper (3"x1" strips will cover a nugget), or use a mailing label stamped with Halloween images.


Supplies: Cardstock (Bazzill), Patterned paper (Carolee's Creations, Reminisce), ribbon, epoxy tags (Making Memories)

Tuesday, October 14, 2008

Halloween Countdown - Day 1

For some reason I've been getting a lot of subscribers to my blog lately...which is odd since I've been such a negligent blogger! Anyway - I took it as a sign that I better do some blogging tout suite so here I am...back at it.

Since Halloween is one of my all-time favourite holidays I thought I'd do a little mini Halloween countdown and try out some holiday treat boxes and other Halloween goodies for the next two weeks or so.

Last year I made 200 treat boxes to give away to the neighbourhood kids. I had a lot of time on my hands as my daughter decided to show up two weeks late. Everyone said I should kiss my papercrafting days goodbye as I'd never have time after the baby came. Well, my little girl turns one tomorrow (hard to believe) and I am desparately trying to prove those naysayers wrong!!!

Anyway, here's Halloween treat box number one. This is a fun little box, suitable for holding a few mini chocolate bars or other treats (it can hold about 1 cup of candy). The template fits on one 8.5 x 11 sheet of cardstock and the fabulous thing about it is that it takes just one little 3-inch strip of sticky tape to hold it together. The rest of the box stays together with built in tabs! Options for decorating are endless. In this sample I cut a little round window in the front so you could peak through at the candy but you can leave it completely closed as well.

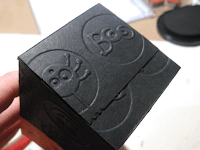
I used a Stampin' Up! wheel with VersaInk on black cardstock and then embossed it with white embossing powder. While the powder was still hot and sticky I added some Glow powder to it. It gives it a slightly greenish tint but the cool thing about it is that it glows in the dark. I couldn't really capture it on camera - but trust me - its cool.

If you would like a pdf of the template for this box, please email me at graphixgirlliluAThotmailDOTcom and I would be happy to send it. I'll try and post it later this week.

Supplies: Cardstock (Papertrey Ink - kraft, Stampin' up! - black, pumpkin pie), Stamps (Stampin' Up!, Papertrey Ink), punch (Martha Stewart, Stampin' Up!), embossing powder, Patterned Paper (Doodlebug).

Thursday, August 21, 2008

Flocked and Torn Halloween Card

Do you ever have that experience of going into a craft store and finding some nifty new product and then wondering to yourself "am I ever going to use this if I buy it"? So that was me today. Crazy day, needed to blow off some steam, went to one of my LSSs while waiting for my pizza and there I saw it...Doodlebug flock. Now, I've bought flock before but I'd never seen any in the beautiful assortment of colours that Doodlebug has put out. I had to have it. Four, five, six colours went into my basket. On my second trip through the store, some came out. Can't be greedy now...what if I don't like it... I settled on orange, black and lime green since my up-and-coming projects are mostly Halloween...

Anyway, long shopping story short, I really love this stuff. Its not like any of the flocks I've used before. Its fine and soft to the touch and leaves a beautiful texture on your project.
Here's my first attempt at using it. Forgive the blended colours - I'm experimenting here. Actually, it works with this card because I kind of have a grungy thing going on here. This card was also for today's "Ways to Use It" challenge on Splitcoast which asked us to use torn paper.
For the flocked bits I laid down a piece of double sided adhesive and then put diecut bats over top of it. I flocked with the orange first, removed the bats and then flocked with the black. The flock does adhere to itself a bit so its not a completely clean background but I like the texture it creates on the card.
Supplies: Cardstock (Bazzill), Paper (BoBunny Press), Stamp (Inkadinkado), ribbon (May Arts), Flock (Doodlebug), Diecut (Quickutz - bat), ink (Adirondak, Ranger)


Monday, August 18, 2008

Paper Pinecone Update


A couple of folks have asked me for some more detail on building this little paper cone so I thought I would create a diagram to show how each row should be pinned. This diagram is as if the project were flat. There are four triangles to each row and the top point of each triangle should be lined up with the seam between triangles of the row above it. Pin only the bottom two points and leave the top point free to form the "spikes" of the cone.

I hope this helps to clarify a bit more. It took me a couple of tries to figure out how to make these ornaments.

Saturday, August 16, 2008

Halloween Paper Pinecone

Halloween is by far one of my most favourite holidays. In fact, its second only to Christmas on my list. It has been made all the more special by the fact that my daughter was born mid-October. For her first birthday I'm planning a Halloween themed party and I thought it might be nice to make some decorations for the house.

I've made these lovely little paper pine cones before as Christmas tree decorations. They actually make quite nice gifts as well. There are very easy, and inexpensive but they do take a little bit of time to complete. I thought I would try a few using Halloween themed paper and colours rather than my traditional Christmas.

What you will need for this project: two sheets of 12x12 paper in contrasting colours (you can also make it a single colour if you wish), sheer ribbon (1/2" - 1" wide - about 1 yard), 3" Styrofoam balls, applique pins (short little pins), thimble, stamps to decorate as desired.

Step 1. Cut your two sheets of paper into strips 2" by 1". It is important to use paper-weight patterned paper and not cardstock weight.

Fold one side down, and then the other to form a triangle with the seam in the middle.


This part takes a bit of time but eventually you'll end up with two piles of little triangles. I do this in front of the television to cut down on the boredom factor of folding dozens of tiny triangles...


Using the applique pins, attach your foundation layer of triangles (seam side down) to the top of the Styrofoam ball. Put two tip to tip like so and then...


Add two more to make a square.


Pin the corners of each triangle down onto the foam ball. The corners will slightly overlap.


Then take four triangles from your contrasting colour and place them over the foundation row, pinning the bottom corners and leaving the top corner free. The tip of the new row should be lined up with the seam of the foundation row.


Your completed second row should look like this. Notice how the free points "stick out" from the foam ball on this row.


Continue adding rows in this manor - overlapping the row above and lining up the point of the new triangle with the seam between triangles of the row above it.


When you are about halfway down the ball add your length of ribbon. pin down each end on opposite sides using the applique pins (this could be three or four pins per side depending on the width of your ribbon). Make sure you leave enough ribbon loose at the top to form a loop for hanging.


Continue adding the triangles until the entire ball has been covered and only the loop of ribbon is free at the top of the ball. I find it gets harder and harder to push in the pins as you get closer to the end (as they are going through several layers of paper at this point). Use a thimble to save your fingers from wear and tear.


I added a little Halloween tag and a black ribbon tied in a bow at the base of my ribbon loop and voila! A handmade Halloween ornament.

Supplies: Paper (K&Company, Sandylion), applique pins, styrofoam ball, ribbon (May Arts), stamps (Papertrey Ink - Halloween Sweets I), nestabilities, cardstock (Bazzill)

Its stinky hot here tonight so I'm glad to be trapped in my craft room (in the basement). Its 87 degrees upstairs and the humidity is really high so you start to sweat just sitting around watching TV. As much as I love a sunny day, I'm hoping for some slightly cooler weather tomorrow...